Tuesday, November 29, 2011

Apple Picking with Mayberry

How many times do you go through your pictures and think, "Man, I wish that picture wasn't blurry!" or "Ugh, why are there so many shadows?" Do you hesitate to scrapbook those less than perfect photos? As much as I wish my Nikon camera would transform me into this super-perfect, award winning photo journalist I realize that it won't. So, sometimes I'm left with blurry and shadow filled pictures.

Today's layout uses the Mayberry WOTG to help me tell the story of our 2nd apple picking trip from 2010. And yes, if you take a close look at the photos you will see they are anything but perfect! That's OK though. That's what happened at the time and those photos tell our family story.


The layout was created using The Mayberry WOTG kit that was launched in the Spring/Summer Idea Book. The WOTG is no longer available but the paper is and so are the Token Alphabet set and Badge Buttons used to create the title and accents.


I hope the next time you have less than perfect photos you still use them and share them on your blog!

Supplies used (all CTMH unless otherwise noted):
Paper: Mayberry (X7136B)
Stamps: Token Alphabet (E1020), Mayberry WOTG (retired)
Ink: Smoothie ((Z2196), Olive (Z2137)
Other: Canvas Badge Buttons (Z1397), 1 1/4" Circle Punch (Z1311)

Sunday, November 27, 2011

Our BeautiFUL Life Layout

Now that my computer is fixed I have the opportunity to scrapbook again! So, yesterday I created this layout highlighting our 2010 Thanksgiving. I was 7 months pregnant and my doctor's didn't want me to travel so we stayed home and had an intimate celebration...in our PJ's!! It was lovely and completely relaxing!


I started out with the Imagine "Up the Tempo" sketch but didn't like the orientation of the left page so I rotated it to fit my needs.


The pattern paper is an old Making Memories Kit I found in my stash while I doing some scraproom cleanup (yet another advantage of a broken computer). I didn't have cardstock in the kit so I looked through the 60 CTMH colors and found Juniper...a perfect match!


I didn't stamp one itty bit on this layout (I did ink the edges of my cardstock though)! That might be a first for me. Instead, I used the stickers and tags that came with the kit to create my title and embellishments. I did use my Cricut Art Philosophy Cartridge to cut the "LIFE" in my title. The alphabet set on the cartridge coordinates perfectly with the Dimensional Elements chipboard!


Thanks for looking!

Supplies used (all CTMH unless otherwise noted):
Paper: Making Memories Autumn Spice Kit, Juniper Cardstock, Colonial White Cardstock 
Stamps: none!
Ink: Chocolate, Barn Red
Other: Cricut Art Philosophy Cartridge, Dimensional Elements Alphabet, Ribbon (from my stash)

Saturday, November 26, 2011

Give Thanks Mini Album


 I hope you had a wonderful Thanksgiving. Mine was a little different than normal. My poor daughter was sick so we chose to have her stay at home with me while my husband and boys visited family out of state. It wasn't my ideal holiday but I still wanted to take a moment to celebrate all the things I am thankful for. So, I made this super cute mini-album, "Give Thanks".


The base of the album is made with 3 of the 6" x 6" Kraft Die Cut Cards (the same ones I used in November's card club). You'll be able to make 2 of these albums out of one package. Cute and economical!!


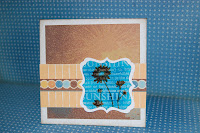
Using the new Cricut Art Philosophy Cartridge, Journaling Spots and Color-Ready Cork Alphabet this album literally came together in just a couple of hours. I love projects like that don't you??!! Here's a close up of the cover. The scallop flap holds the album closed.


With a few different paper choices I think this album would fit so many themes - Christmas, New Baby, or any special event you want to highlight.
If you'd like to make a project similar to this you will need the following items:

Supplies used (all CTMH unless otherwise noted):
Paper: Believe Level 2, Dreamin' Level 2, Colonial White Cardstock, Cranberry Cardstock, Olive Cardstock
Stamps: A Little Thanks (D1444), Treasure Life (D1306), Cricut Art Philosophy Stamp Set, Miracle WOTG (B1378)
Ink: Cocoa (Z2114), Olive (Z2137), Bamboo (Z2103), Cranberry (Z2116)
Other: Cricut Art Philosophy Cartridge, Kraft Die Cut Cards and Envelopes (Z1474), Color-Ready Cork Alphabet (Z1450), Journaling Spots (Z1461), Brads-Green Assortment (Z1364), Cocoa Marker (Z2314), 3D Foam Tape (Z1151), Piercing Tool (Z337), Bone Folder

P.S. Don't forget about my Thanksgiving Sales Event! There's only  a short time left in this special.

Tuesday, November 22, 2011

Exclusive Sales Event! HURRY!!

As my way of saying THANK YOU for all your support I'm offering this exclusive "Michelle Savings" opportunity to my best customers and blog followers! Send me your order between Wednesday, November 23 - Sunday, November 26  and take advantage of my Thanksgiving Specials!

I want you to get the best value for your money so when you are placing your order keep in mind the following CTMH specials:
  •  Order $25 in MyAcrylix stamps and get the exclusive My Holiday stamp set for only $5.00! This set works beautifully with the Cricut Art Philosophy cartridge.
  • When you spend $50 (any product mix), you are eligible to receive the SOTM for only $5.00!
So, if you're keeping track, spend $50 ($25 in stamps) and get an additional D-size stamp set AND SOTM for only $10!

Oh yeah, I almost forgot. Everyone who places an order with this special will also be entered into a drawing for a Workshop on the Go or a CTMH How-To Book (your choice).

You must email me your order no later than Sunday, 8 pm to qualify for the specials! Free items are based on the highest level of sales you qualify for.

Place an Order of $25 - $50
Receive a free package of embellishments of your choice, Dye Ink Pad, or package of brads (up to $5.25 value).
If you spent $25 in stamps then you automatically qualify for the Holiday Wishes Stamp set for $5! At $50, you qualify for the SOTM at $5!

Place an Order of $51 - $75
Receive a free package of Craft Buttons, A-size stamp set, or Designer Ribbon (up to $7.95 value).
If you spent $25 in stamps then you automatically qualify for the Holiday Wishes Stamp set for $5! Plus you qualify for the SOTM at $5!

Place an Order of $76 - $100
Receive a free Quick-Pic album, My Creations Journal, My Reflections Level 2 Paper Kit (up to $9.95 value).
If you spent $25 in stamps then you automatically qualify for the Holiday Wishes Stamp set for $5! Plus you qualify for the SOTM at $5!

 Place an Order of $101- $149
Receive any D-size stamp set or My Reflections Paper Kit + Coordinating accessory

As an added bonus, choose any A through D size Stamp Set absolutely free! So, if you place an order for $101, you will receive up to $41.85 in FREE products.

If you spent $25 in stamps then you automatically qualify for the Holiday Wishes Stamp set for $5! Plus you qualify for the SOTM at $5!

Place an Order of $150 or more
Receive $25 in free products of you choice and any D-size stamp set or My Reflections Paper Kit + Coordinating accessory
As an added bonus, choose any A through D size Stamp Set absolutely free! So, if you place an order for $150 or more, you will receive up to $60.90 in FREE products.

If you spent $25 in stamps then you automatically qualify for the Holiday Wishes Stamp set for $5! Plus you qualify for the SOTM at $5!

This is only available until Sunday, November 27 and you must email me your order to receive your free items!

Tuesday, November 15, 2011

Technique Blog Hop-Ghosting

Welcome to our Technique Blog Hop!  This month we are highlighting the GhostingTechnique as shown on page 45 of the Autumn/Winter 2011 Idea Book!  This blog hop is a great big circle so you can start wherever you want and continue through to see all the fabulous artwork incorporating this technique.  If you would like to start from the beginning, please visit this link.  While there you will also find a listing of all participants and their blog addresses if you should get lost or want to reference a blog along the way.  Let’s get started!


When you hear of the ghosting technique do you automatically think of ghosts and Halloween? I will admit I did too. It actually wasn't until recently that I even learned what "ghosting" was. If you still aren't sure what it is then let me explain. Ghosting is similar to to the emboss resist technique and trust me, it's not scary at all!


The Idea Book shows how to "ghost" using an iron and cardstock. Ironing is not one of my favorite past times so in my example I will show you how to do the same technique with some glossy cardstock. If you don't have glossy cardstock try using glossy photo paper like I did! For a step-by-step tutorial please continue reading. Or, continue on to Bethany's Blog for more artwork.

1. Let's start by gathering all your materials. You'll need paper, Versamark, Glossy Cardstock, Ink and your favorite stamps.


2. Stamp your image with VersaMark Ink onto glossy cardstock. It's a slick surface so you'll want to take extra care not to smear your image.


3. Use a sponge to add ink over the stamped image. The combination of glossy cardstock and VersaMark will resist the stamped image. Wipe off excess ink with paper towel.


4. Stamp image over top and assemble card as desired!

Thanks for stopping by! Please continue onto Bethany's Blog where you will find some additional artwork highlighting this technique!  Be sure to leave a comment and let me know what you thought of my variation and happy hopping!

Supplies used (all CTMH unless otherwise noted):
Paper: Dreamin' Level 2 (X7142B)
Stamps: Treasure Life (D1306), State of Mind (D1416)
Ink: VersaMark, Cocoa (Z2114), Pacifica (Z2192)
Other: Sponge, Cricut Art Philosophy (Z1686), Scoring Tool (Z608), Sanding Block (Z1294)

If you are coming from Cherri's Blog, you are on the right track! 

Thursday, November 10, 2011

Back Up Your Photos!!

When was the last time you backed up your photos? If you can't remember then you'll want to plan some time this weekend and make sure you get that done.

I've recently been having some issues with my home computer and realized it's been way to long since I last backed up my photos. I'm not talking a month or two...I have almost 5,000 photos unprotected. Shame on me! So, the last two days that's what I've been working on. Unfortunately I'm not having much luck in that department and keep getting fail messages. What a pain!

Hopefully I can get this issue worked out so I can start creating and posting some layouts soon. Keep your fingers crossed for me and wish me luck!

P.S. BACK UP YOU PHOTOS!!!!!

Tuesday, November 8, 2011

Happy Holiday Card Set

This past Saturday I had the pleasure of hosting a holiday card workshop with some fabulous gals. We met at Panera Bread and sipped our way through 10 easy peasy holiday cards.


We focused on the super cute Holiday Card featured on page 76 of the Fall/Winter Idea Book (I knew when I saw it I just HAD to make them).


We made our cards assembly style and in less than 2 hours we had 10 fully embellished and complete cards (plus had some wonderful coffee and conversation)!

If you'd like to see just how easy it is to make an armful of cards in just one sitting then view the CTMH video below.  You'll learn some great tips on streamlining your holiday card creation session!


~Michelle

Saturday, November 5, 2011

Super Simple Thank You Cards

Last weekend we finally had my daughter's birthday party (only a month late)! She was so excited and we all had a blast.


Usually my little girl is shy and reserved but not today! She took charge and actually wanted to be the center of attention. I'm so proud of her!! Her smile just made my entire day.


Everyone got into the fun...including me as I raced some of the other parents in a moon-bounce obstacle course! Yes, I won this round! 

Sofia had a wonderful time with all her friends!


Now it's time to get to the thank you cards. In our house if the thank you card isn't written then the gift doesn't make it out of its packaging. Needless to say my kids are pretty anxious to write their thank-you's. Here is Sofia helping me stamp her notes.


And, here's the finished project. Not too bad for whipping them up super quick!

The paper is from DCWV, The Sweet Stack. I've been hoarding this paper and finally figured it's time to use it up. My thank-you's are done and I used up some of my paper stash. Awesome!

Supplies (all CTMH unless otherwise noted):
Paper: DCWV Sweet Stack, American Crafts Cardstock
Stamps: Salutation Seals (C1461)
Ink: Cotton Candy (Z2193), Brown Bag (Z2108)
Tools/Other: 1 1/4" circle punch, 2" Circle Punch

Thanks for looking!
~Michelle

Thursday, November 3, 2011

November Card Club

This month's card club projects focus on flowers three ways! Not only will we stamp some gorgeous layered flowers but we will also create flowers with our cricut AND learn how to make the super fun accordion flower. Plus we'll use the new 6" x 6" Kraft Die Cut Cards. I'll even show you some creative ways to the use the scallop closure piece. Can you believe all of this is only $5??!!

The center card was inspired by THIS post by Vicki Wizniuk
Card Club is Friday, November 11th at 7:00 pm. If you are in the Northern Virginia area and can attend I'd love to have you. If not, I have kits available for purchase.

Here's what's included in each kit:
  • pre-cut and pre-stamped images
  • Full-color assembly instructions
  • 3 - 6" x 6" Kraft Die Cut Cards
  • Chocolate Grosgrain Ribbon
  • 2 - Rhinestone Bling Brads
The price is $5.00 (shipping charges apply for kit orders).  If interested send me an email or leave a comment on this post. Your kit purchase will count towards budget club and will help you earn $25 in free rewards!

Wednesday, November 2, 2011

Blog Candy Winner Announced

Thank you to those who entered my first blog candy contest! I hope over the course of the month my creations have inspired you to get crafty.

Without further ado, the lucky winner of the card kit is...Danielle!

Danielle said...
Great giveaway!!!! I've been a bad blogger for the past 2 weeks too!!!

Thanks Danielle for entering and congratulations on your win!
Please send me an email at handmadefromtheheart@gmail.com with your info and I'll get your prize shipped ASAP!

~Michelle