Showing posts with label ShinHan Markers. Show all posts

Friday, April 1, 2016

April SOTM Blog Hop - Life In Pictures

Welcome to the Stamp of the Month (SOTM) Blog Hop. Today, Close To My Heart consultants will be showcasing creative ways to use the April SOTM, Life in Pictures. If you've arrived from { Priscilla Gotham's blog } you are on the right track. To see a list of all participating consultants please visit Melinda's blog { HERE }.


For my project I made a two-page scrapbook layout of my husbands 40th birthday celebration from 2015. I used Urban papers and complements to coordinate with our Mexican Fiesta themed party.


The camera images were stamped on Colonial White Cardstock and colored with ShinHan Touch Markers. They were fussy cut and popped up on the page with Thin 3D Foam Tape.


The photo frames were also stamped on Colonial White Cardstock. They are backed with cardstock from the Enchantment Paper Fundamentals pack. The "Smile" phrase was stamped on one of the arrow accents from the Urban Complements pack. I love how perfectly the sentiments fit!


Thanks for checking out my page. I hope it inspires you to create your own layout using the Life in Pictures Stamp Set! As a reminder this stamp set is only available until April 30th. For more information or to purchase yours please contact your CTMH consultant or visit my webpage { HERE }

Please continue to { Brenda Lapp's blog } to see what she's created!

Project Recipe (All CTMH Unless otherwise noted):
Paper: Colonial White Cardstock (1388), MyReflections Urban Paper Pack (X7204B), Pacifica Cardstock (X5759), Paper Fundamentals -Enchantment (Z3126)
Stamps: Life in Pictures (S1604)
Ink: Sapphire (Z2648), Archival Black (44751), Saffron (Z2651)
Other: Urban Complements (X7204C), Fundamentals Stickers-Enchantment Pack (Z3164), Fundamentals Stickers-Basics Pack (Z3166), Blue Enamel & Glitter Duos  (Z3122), Thin 3D Foam Tape (Z2060)
ShinHan Touch Markers: Warm Grey4, Pastel Green, Cerulean Blue, Mahogany, Carmine, Golden Yellow


Tuesday, March 1, 2016

March SOTM - Sunshine Birdies

Welcome to the March SOTM Blog Hop! Today, approximately 39 CTMH consultants will be showcasing different uses for the Stamp of the Month, Sunshine Birdies. Sunshine Birdies is a set of 11 adorable stamps and is only available for the month of March.


If you've arrived from  { Michelle Loncar's blog } you are on the right track! This blog hop is a great big circle. At the end of this post simply click on the "next blog" link to be taken to the next participant. If you would like a complete list of hoppers please visit Melinda Everitt's blog{ HERE }.


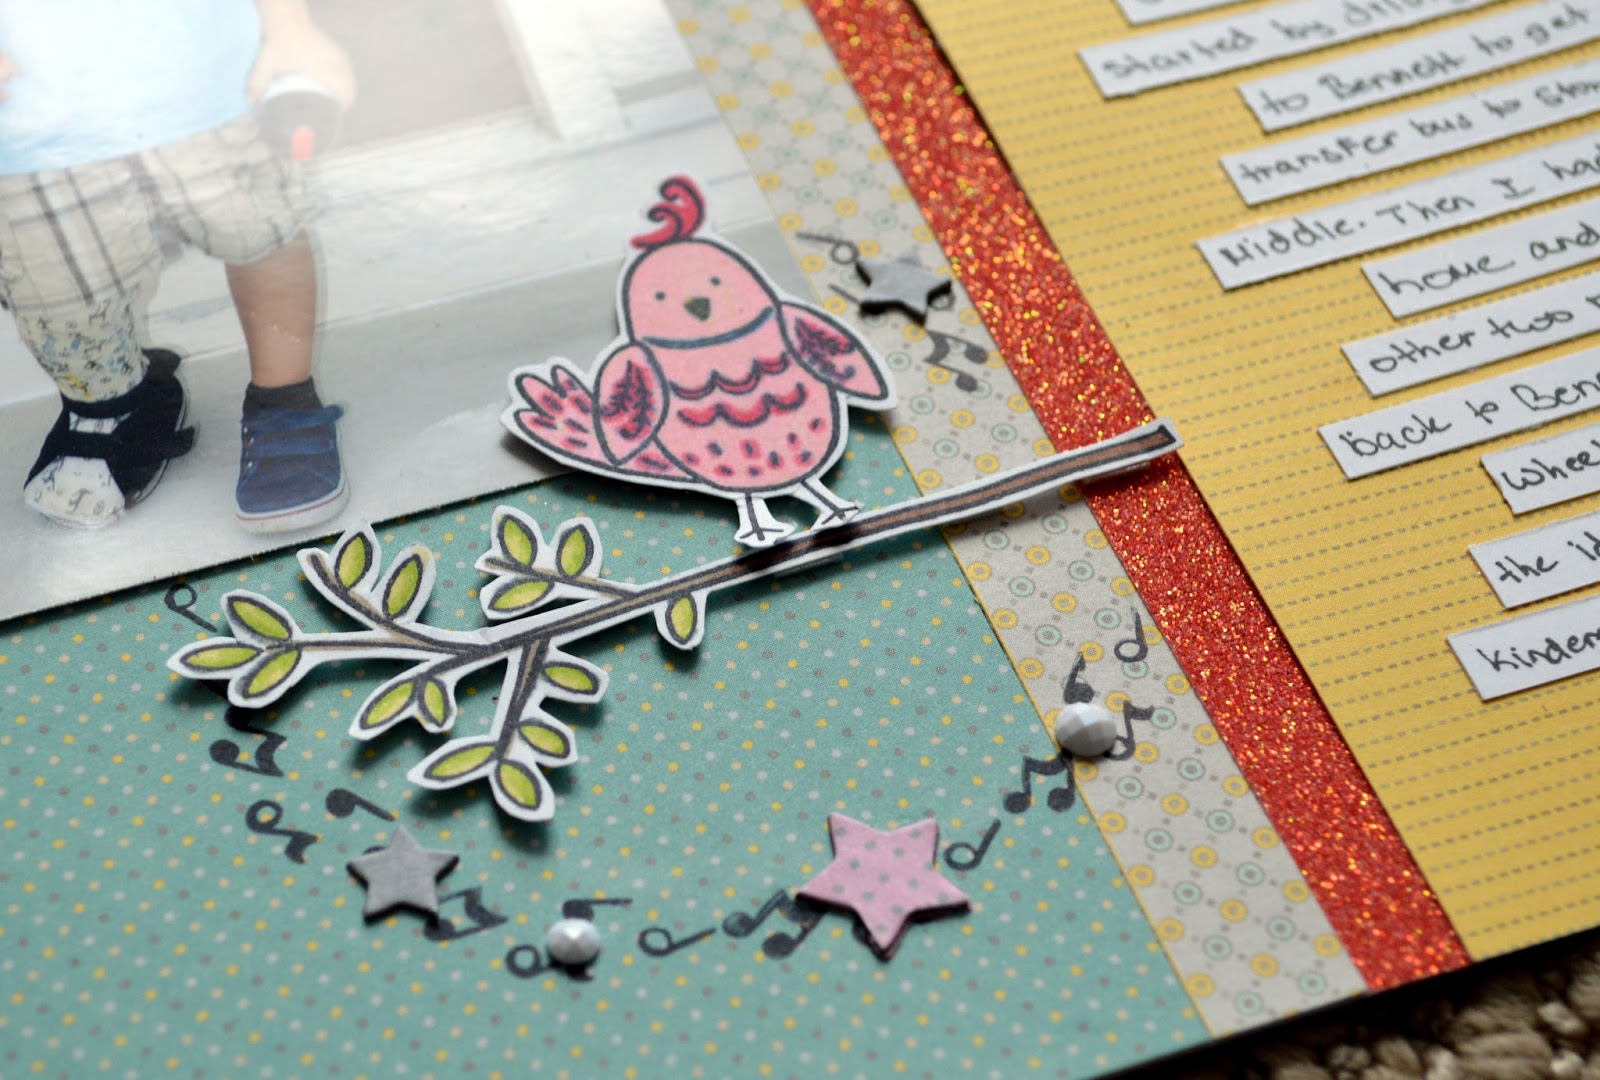
The sentiments on this set are near and dear to me. It's the song I used to sing to my first born every day when he was a little baby. Now I have three beautiful "sunshines" so I created a layout showcasing all three of them!


The layout is about the first day of school and uses the Georgie paper line and coordinating Georgie Compliments to accessorize. To create the "You are My Sunshine" title I carefully cut my stamp (yes, you can do that) to fit on the die cut shape. If you don't want to cut your stamp you could also mask it with scrap paper or post-it notes.


For the music note circles I cut a circle out of scrap paper and traced it on my paper with a pencil. Then, I simply stamped the notes around the circle.

All the birds and tree branches were stamped on White Daisy Cardstock using Archival Black Ink. Each accent was colored with our ShinHan Touch Markers. I fussy cut each one and popped up using Thin 3D Foam Tape around the page.


I hope this inspires you to try something new with your stamp set! As a reminder, this set is only available until March 31. To purchase it, or any of the products used on this layout, please contact your CTMH Consultant or visit my website, www.michellebattitori.ctmh.com

Please hop to  { Jean McNulty's blog } to see what she's created!

Layout Recipe (all CTMH unless otherwise noted):
Paper: Slate Cardstock (X5930), Georgie Paper (X7203B), White Daisy Cardstock (1385)
Stamp: Sunshine Birdies (S1606)
Ink: Archival Black (44751), Slate (Z2173), Poppy (Z2652)
ShinHan Touch Markers: Marigold (Z2457), Cerulean Blue (Z2449), Tender Pink (Z2464), Leaf Green (Z2454), Golden Yellow (Z2452), Barely Beige (Z2445), Cherry Pink (Z2450)
Other: Georgie Compliments (X7203C) , Grey Enamel Gems (Z3089), Journaling Pen (Z1979), Thin 3D Foam Tape (Z2060), Coral Shimmer Trim (Z3088), Art Philosophy Cricut Cartridge, 

Tuesday, February 23, 2016

March Creative Club


March Creative Club is scheduled for Friday, 3/11, at 7 pm! We'll be exploring 4 different coloring techniques using the ShinHan Touch Markers and the adorable Spring Critters stamp set and coordinating Thin Cuts Dies

Cost for the class is only $5! If you are in the Northern VA area I'd love to have you attend. To RSVP please visit my meetup.com group { HERE }!

>>> Michelle's Exclusive Special <<<


Purchase any 5 ShinHan Markers of your choosing and receive a FREE Colorless Blender from me! 

 To claim your free Colorless Blender simply place an order for 5 ShinHan Touch Markers on my website, www.michellebattitori.ctmh.com, let me know you ordered and I'll send you a Colorless Blender in the mail (or have it at club if you are attending). That's it!

This offer is not sponsered by CTMH and is only available through me, Michelle Battitori, CTMH Independent Consultant.

Sunday, May 31, 2015

Ice Cream Dream Blog Hop

Welcome to the June Stamp of the Month blog hop! This month CTMH consultants are featuring the delicious Ice Cream Dream stamp set. If you are coming from Michele Rowley's blog you are on the right track!


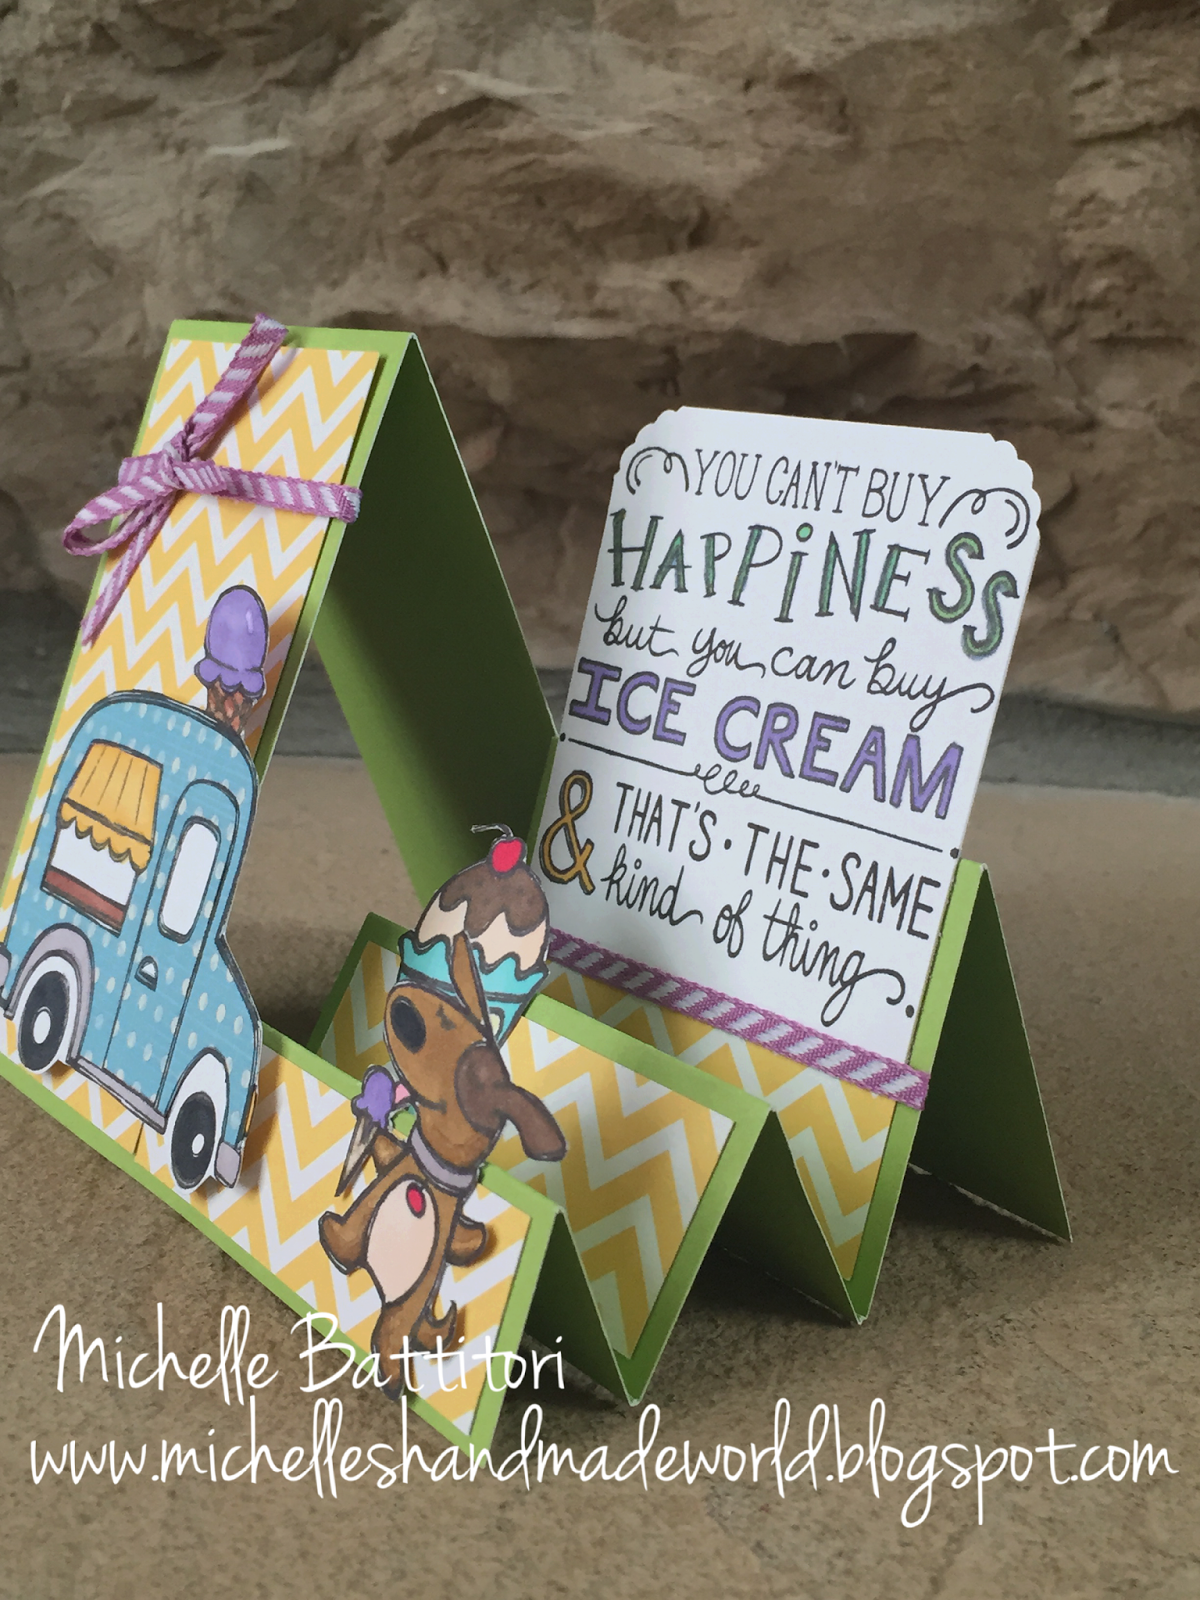
For my project I created this adorable stair step card! The base of the card was made with Pear Cardstock and accented with the Whimsy Paper Fundamentals pack.


The ice cream truck, sundae, and dog were stamped on White Daisy Cardstock using black ink and then colored with a variety of our ShinHan Touch Markers. The truck was paper pieced using a sheet of the Wanderful paper pack.


To create the paper pieced truck stamp the truck once on White Daisy Cardstock and then again on Wanderful paper using black ink. Trim outline of truck on White Daisy Cardstock. Use an x-acto knife to carefully trim the truck out of the Wanderful paper making sure to cut out the window, door window and wheels. Color the awning, and wheels with ShinHan Touch Markers and use the Bonding Memories Glue Pen to adhere to the White Daisy image. Adhere to card using 3D Foam Tape!

Supplies Used (all CTMH unless otherwise noted):
Paper: Pear Cardstock, Paper Fundamentals-Whimsy (Z2033), Wanderful (X7191B), White Daisy Cardstock
Ink: Black (Z2105)
Stamp: Ice Cream Dream (S1506)
Other: Diagonal Striped Ribbon-Thistle (Z1990), 3-D Foam Tape (Z1151), Bonding Memories Glue Pen (Z553), X-acto Knife (Making Memories), Scissors
ShinHan Touch Markers: Bronze-99, Pastel Green-49, Barely Beige-29, Melon Yellow-33, Cherry Pink-5, Walnut-100, Mahohony-96, Lavender-83, Cerulean Blue-63, Black-120, Tender Pink-198, Warm Grey-WG4, Yellow Green-48, Colorless Blender-0

Thanks for checking out my project! Now it's time to hop to Chris Robertson's blog to see what she's created! If for some reason you get lost on this fabulous blog hop please visit Melinda's blog for a complete list of participants.


The Ice Cream Dream Stamp set is only available until June 30th. To purchase one please contact your CTMH consultant or visit my website HERE.

~Michelle Battitori

Monday, November 10, 2014

Two Single Page Scrapbook Layouts


It's been awhile since I've done any traditional scrapbooking. I decided to "ease" into it a bit by creating these single page layouts without any stamping. This also just happens to coordinate with November's Heart 2 Heart Challenge this month!


The "All Boy" layout features the paper Good Times, a retired set. I actually bought it 5 years ago...yes, I have LOTS of paper! The journaling was done on one of the Picture My Life (PML) Chalk It Up cards. I love that even though the PML cards are current products they still coordinates with my older CTMH papers!


The "Good Times" layout features another retired set called Caboodle. For this layout instead of using a PML card I created a journling block to mirror the chipboard total.


 I used the Cricut Artbooking cartridge to bring the photo mat found on page 82 into Design space. I resized it to 4 1/2" and copies it to create another layer. I cut them out in coordinating papers and then used my Shin Han Maker to create the dots.


Super easy and super quick! And that's a good thing when you have tons of photos to scrap! Thanks for looking!

~Michelle

P.S. Did you know that the PML cards now have a la carte options?! Yep, you can get the same beautifully designed cards but without the Memory Protectors or designed cover sheet! Check them out on my website HERE!


Monday, October 6, 2014

ShinHan Marker Blog Hop - Marbled Background


Welcome to our ShinHan Marker Blog Hop!  If you have come here from Kelly's Blog, you are on the right path! The blog hop is a great big circle, so you can start here and work your way all around.  If you get lost along the way, you’ll find the complete list of participating consultants on Melinda’s Blog: http://www.ifyoublingit.blogspot.com

This month we have over 40 Close To My Heart Consultants sharing their creations using the ShinHan Markers and other great CTMH products on their blogs. This is simple to do - just click on the link at the end of the post on each blog to move to the next one! Here we go!


Supply List: (all CTMH unless otherwise noted):
Paper: New England Ivy Cardstock (1282), 4x6 photo paper (Epson)
Ink: Archival Black (44751)
Stamp: In the Moment (C1565)
Other: ShinHan Markers (Vivid Green, Deep Olive Green, Mahogany, Carmine, Marigold, Barely Beige), Spray Pen (Z1380),  Magnets (Amazon), Rubbing Alcohol (CVS)

My project, a magnetic bookmark, was inspired by THIS alcohol marker marbling technique. Here's a detailed, step-by-step tutorial on how to make the marbled background:

1. Gather your supplies. You'll need ShinHan Markers (4-6 complimentary colors), Glossy Cardstock, Regular Cardstock, Ziploc-type bag, and Rubbing Alcohol Spray (a full list of products and item numbers can be found above).


 2. Insert cardstock into Ziploc bag. This is your template. I secured mine on my VersaMat with a little bit of scotch tape.

3. Color the top of the bag with ShinHan Markers making sure to cover the entire template. Actually, it's more like scribbling then coloring and you do not need to blend your colors.


4. Spritz bag with rubbing alcohol until inks look wet and droplets of liquid are visible. 


5. Place glossy cardstock (I used 4" x 6" photo paper) onto bag with glossy side down, pressing and holding for a few seconds. Lift glossy cardstock up. You can leave it as is or repeat steps 3-5 until you are satisfied with the color.


6. Use your new background to complete your project! 


To finish my bookmark I cut a piece of cardstock to 8 1/2" x 1 3/4" and folded in half. Next, I trimmed my new background piece into 4" x 1 1/2" strips and mounted onto folded cardstock. I also used a couple different sentiments from the In The Moment stamp set using Archival Black ink. To finish it off I adhered two sets of magnets to the inside of the bookmark. That's it! So easy and now I'll never lose my place in my book! 

 
Thanks for sticking around and checking out my project! Now "Hop" on over to Jean's Blog to see her work! Be sure to visit all the Consultants at their Blogs to get some great crafting ideas and other fun ideas! To purchase your own set of ShinHan Markers please contact your CTMH Consultant or visit my website HERE.


~Michelle Battitori