Sunday, November 30, 2014

December SOTM Blog Hop - Cutie Pie


Welcome to our Stamp of the Month Blog Hop!  We will be featuring December's SOTM, Cutie Pie, a set of 11 stamps.  If you have come here from Melissa's Blog, you are on the right path! The blog hop is a great big circle, so you can start here and work your way all around.   

This month we have approximately 60 Close To My Heart Consultants sharing their creations using this month's SOTM and other great CTMH products on their blogs. If you get lost along the way, you’ll find the complete list of participating consultants on Melinda’s Blog:  http://ifyoublingit.blogspot.com/p/stamp-of-month-blog-hop-list.html
  
For my project I made this fun birthday card using Confetti Wishes Paper! This paper is absolutely PERFECT for this stamp set and the images are made for coloring with your Shin Han Touch Markers!


The sentiment, "hey there, cupcake," is a long solid image. To get it on two lines I wrapped portions of it on my blog only inking the parts I wanted to stamp. I guess you can call it the "lazy masking" technique but it works beautifully with our acrylic stamps!


Products Used (all CTMH unless otherwise noted):
Paper: Gypsy Cardstock (X5757), Confetti Wishes (X7189B), White Daisy Cardstock (1385)
Inks: Black (Z2105), Whisper (Z2172)
Stamp: Cutie Pie (S1412)
Other: Shin Han Touch Markers (Lavender, Melon Yellow, Turquoise Blue, Tender Pink, Flesh), Teal Shimmer Trim (Z1918), Red,Pink & Purple Sparkles (Z1326), 3D Foam Tape (Z1151), Scissors

Now "Hop" on over to Michele's Blog to see her work! Please visit all the Consultants at their Blogs to get some great crafting ideas and other fun ideas! Remember, the November SOTM is only available until December 31!  Contact your CTMH Consultant (or click HERE) to see how you can get this stamp set at a discount!


P.S. This card is based on this week's Freshly Made Sketch #164

Cyber Monday Only: 20% Off All Cricut Collections


Close To My Heart


For the first time ever, Close To My Heart is offering a Cyber Monday Sale on Monday, December 1, 2014. There has never been a better time to buy Close To My Heart's exclusive Cricut® Collections for 20% off the retail price. Whether you love scrapbooking, cardmaking, or creating 3-D projects, our four exclusive Cricut® collections make the perfect addition to any craft room! Sale starts at midnight (MST) on December 1 and ends at 11:59 pm Monday night. 


Tuesday, November 18, 2014

December Daily Album with CTMH


It's that time of year to start getting your December Daily albums ready! Not sure what it is? I think Ali Edwards describes it best:

"The simple goal is to capture the spirit of December via one story per day."

The way you document is totally up to you. Some simply print and combine photos while others like to create mini albums. I'm planning on a combo of both and using the MyCrush Holiday Happenings Book from CTMH!

Here are a recommended list of items you will need to get started:

  • My Crush Holiday Happenings Book (Z2098): 30 – 8¼" × 6½" pages in a mix of styles: printed vellum; printed, cardstock-weight; and page protectors in various styles. Kraft hardcover with foil gold accent, wire-bound.
 
  • My Crush Holiday Happenings Badge Buttons (Z2051): 8 adhesive-backed mini badge buttons in 8 designs, ¾"
 
  • Crush Holiday Happenings Assortment (Z2062): Includes 4 – 4" × 6" Cards, 8 – 3" × 4" Cards, 18 – 2" × 2" Cards, 4 – 4" × 4" Sticker Sheets, 2 – 4" × 4" Alphabet Sticker Sheets, 4 – 2" × 2" Envelopes
Need more info on creating a December Daily Album? Here are some helpful references and sites to get you going:


I hope you'll consider joining me and some other crafty consultants on this journey! If you would like to purchase any of the supplies listed above please contact your CTMH Independent Consultant or visit my website, www.michellebattitori.ctmh.com.

~Michelle Battitori

Monday, November 17, 2014

Angel Christmas Card


Today I made a simple Christmas card using the Hostess Rewards stamp set, Sing Glory (C1587), and my favorite paper, Snowhaven. The card is based on Freshly Made Sketch #162 

It's hard to tell in the photo but the Cranberry Cardstock is embossed in a stripe pattern.

The "Glory to the Newborn" sentiment was stamped on a scrap piece of White Daisy Cardstock in Cranberry ink and pieced onto the card front.

I love the simplicity and softness of this card!

Supplies Used (All CTMH Unless Otherwise Noted):
Paper: Snowhaven, Cranberry Cardstock, Slate Cardstock, White Daisy Carstock
Stamp: Sing Glory (C1587)
Ink: Cranberry, Glacier, Slate
Other: Metallic Baker's Twine, Designer Brads Shimmer, 3D Foam Tape, Scoring Tool


~Michelle Battitori

Tuesday, November 11, 2014

Vinyl Glass Block Class


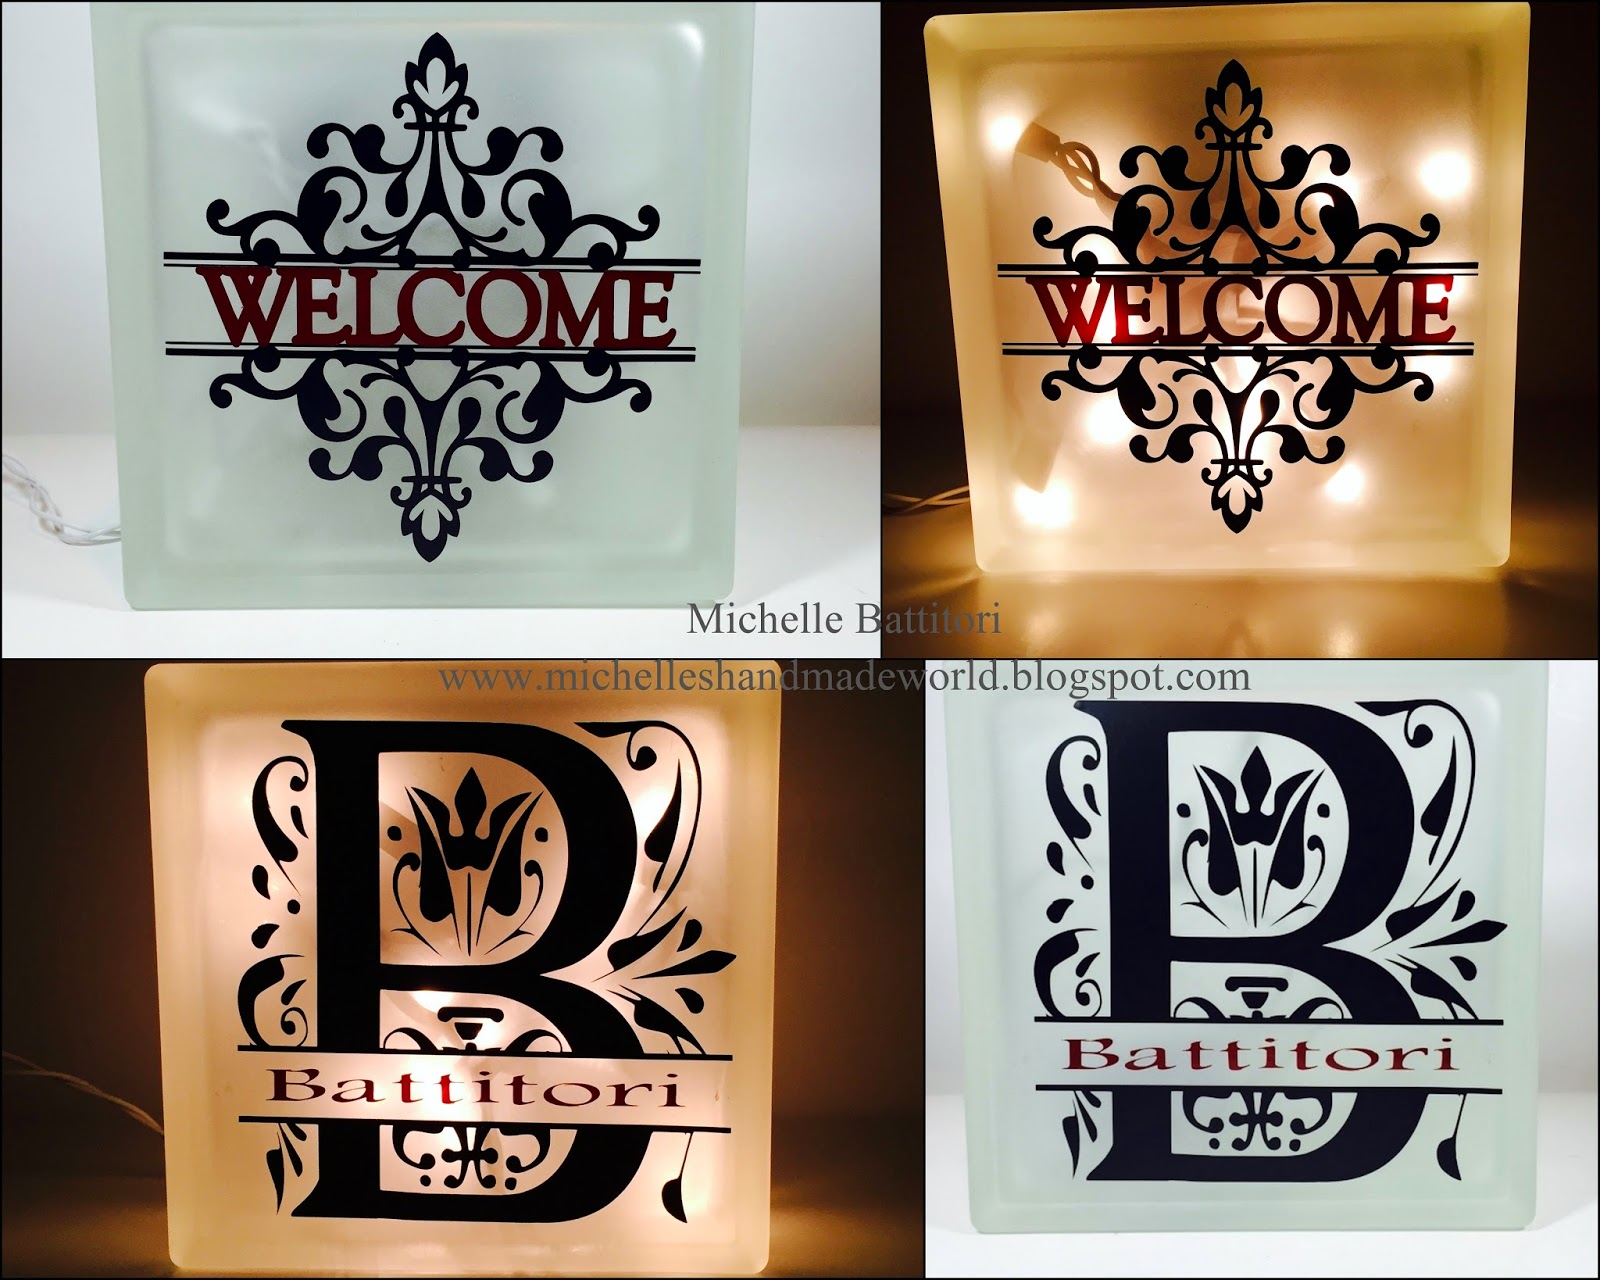
I've received a lot of positive feedback with my lighted glass blocks and am now offering it as a class! If you are in the Northern VA area please join me on November 22 at 10 am to make either the "Welcome Scroll" or "Split Monogram*" glass block!

These blocks are perfect additions to your home decor or make great gifts for family, friends, and teachers!

*The full alphabet is available for the monogram option. Please specify name preference when you RSVP. (I'm working on creating a photo of the full monogram alphabet and will edit this post when I have it available.)

This class will include the following:

  • (1) pre-frosted 8" x 8" glass block
  • (1) set of 20 plug in lights
  • pre-designed vinyl in your choice of either "Welcome Scroll" OR "Split Monogram" 
  • Transfer tape
  • Use of my Cricut Machine and Cricut tools
The scroll and monogram will be cut in black and you will have a limited selection of color vinyl colors to choose from for the interior words. 

To attend this class please RSVP at my Meetup Group, Manassas Area Papercrafters. You must RSVP by Wednesday, November 19 and pre-payment is required to attend. 

Hope to see you on November 22nd! 

~Michelle Battitori

Monday, November 10, 2014

Two Single Page Scrapbook Layouts


It's been awhile since I've done any traditional scrapbooking. I decided to "ease" into it a bit by creating these single page layouts without any stamping. This also just happens to coordinate with November's Heart 2 Heart Challenge this month!


The "All Boy" layout features the paper Good Times, a retired set. I actually bought it 5 years ago...yes, I have LOTS of paper! The journaling was done on one of the Picture My Life (PML) Chalk It Up cards. I love that even though the PML cards are current products they still coordinates with my older CTMH papers!


The "Good Times" layout features another retired set called Caboodle. For this layout instead of using a PML card I created a journling block to mirror the chipboard total.


 I used the Cricut Artbooking cartridge to bring the photo mat found on page 82 into Design space. I resized it to 4 1/2" and copies it to create another layer. I cut them out in coordinating papers and then used my Shin Han Maker to create the dots.


Super easy and super quick! And that's a good thing when you have tons of photos to scrap! Thanks for looking!

~Michelle

P.S. Did you know that the PML cards now have a la carte options?! Yep, you can get the same beautifully designed cards but without the Memory Protectors or designed cover sheet! Check them out on my website HERE!


Friday, November 7, 2014

Snowhaven Christmas Card


I had a lot of fun playing with the stamps from the Snowhaven Cardmaking Workshop on the Go and sketch #161 from Freshly Made Sketches!

The bright and cheerful colors pop right off the card and the hint of sparkle from the Metallic Baker's Twine gives the card just the right amount of bling! This one may become a repeat this season.

Products Used (all CTMH unless otherwise noted):
Paper: Snowhaven (X7188B), Cranberry Cardstock, Slate Cardstock, White Daisy Cardstock
Stamps: Snowhaven Cardmaking Workshop on the Go (G1085)
Ink: Glacier, Slate, Cranberry
Other: White Daisy Card and Envelope Value Pack, Metallic Bakers Twine, Mistletoe Assortment (retired)

Have a great day!

~Michelle Battitori

P.S. Here's the sketch:

Thursday, November 6, 2014

Artfully Sent Blog Hop - Gift Bags


Welcome to our Artfully Sent Blog Hop!  We will be featuring the AMAZING benefits of the newest CTMH Cricut Cartridge...Artfully Sent. If you have come here from Paige's Blog, you are on the right path! The blog hop is a great big circle, so you can start here and work your way all around.  If you get lost along the way, you’ll find the complete list of participating consultants on Melinda’s Blog.

This month we have over 40 Close To My Heart Consultants sharing their creations. This is simple to do - just click on the link at the end of the post on each blog to move to the next one! Here we go!


The Artfully Sent Cartridge is chock full of card options -- pop-ups, swing style, and scenic, with over 700 images to choose from! It's also great for embellishments and the stamps that come with the set are so versatile I see them being my go-to for A LOT of future projects!

I never seem to have enough gift bags...especially around the holiday's so I knew for my project I wanted to turn some of the holiday cards on the Artfully Sent Cartridge into gift bag decor!


If you have a large mat you could cut the full card and trim off the back but I don't. It wasn't a problem thanks to THIS very helpful tutorial and the slice feature in Design Space.

I've done the hard work already so if you'd like to make one for yourself here's the FREE Design Space file: https://us.cricut.com/design/#/canvas/project/21757000

(Note, it takes a little bit to load so please be patient)

Products Used (All CTMH unless otherwise noted):
Paper: Snowhaven (X7188B), Cranberry Cardstock, Black Cardstock, Silver Glitter Paper (Z1829)
Ink: Cranberry (Z2116), Black (Z2105)
Stamps: Artfully Sent Stamps (D1631 Curlique & D1629 Just to Say)
Other: Cricut Artfully Sent Cartridge, Black Ribbon, Gift Bag (Dollar Tree)

To make a different style gift bag here are the steps you'll need to use:

  1. Open Design Space and change canvas to basic shapes. Choose rectangle and change size to the size of our gift bag (mine was 10 1/2" x 8 1/4).
  2. Insert desired card from Arfully Sent Cartridge (I used Sentiment Layer on p. 49).
  3. Insert basic rectangle shape and size to fit the back of the card. 
  4. Hide or delete the score line layer (this is very important otherwise the slice feature won't work).
  5. Select the items (but DO NOT GROUP).
  6. Right click and select Slice! When the rectangle shape turns the same color as the card you'll know the slice function worked and you can remove the back of the card!
  7. Size the card front as needed and continue decorating!
It may seem like a lot of steps but I promise it's really not that bad! If I wasn't so camera shy I'd make a video. Lol! 

Now "Hop" on over to Jean's Blog to see her work! Be sure to visit all the Consultants at their Blogs to get some great crafting ideas and other fun ideas! To purchase your own Artfully Sent Cricut Cartridge contact your CTMH Consultant or visit my website HERE!

~Michelle Battitori

Saturday, November 1, 2014

3D Paper Scarecrow - Fall Decor


I am totally in LOVE with my newest fall decoration! Can you believe it's made completely out of paper (aside from the buttons and hemp of course)??!! I can't wait to get him up on my mantle.


This adorable scarecrow was cut using the Leaves Are Falling design from Svg Cuts. It was super easy to cut thanks to my Explore and the fantastic written and video tutorial. I'm not going to lie...it took some patience (and some sticky fingers) to make but I'm really happy with the result!

Supplies Used (All CTMH unless otherwise noted):
Paper: Pathfinding B&T, Glacier Cardstock, Olive Cardstock, Blush Cardstock, Barn Red Cardstock, Cocoa Cardstock, Sunflower Cardstock, Black Cardstock, Bamboo Cardstock
Ink: none
Stamp: none
Other: Leaves are Falling SVG File (SVG Cuts), Hemp, Buttons (from my stash), Hot Glue, Liquid Glass

Have a wonderful day!

~Michelle