Sunday, August 31, 2014

Stamp of the Month Blog Hop


Welcome to our Stamp of the Month Blog Hop!  We will be featuring September's SOTM, which is Family Love, a set of 7 stamps.  If you have come here from Pam's Blog, you are on the right path! The blog hop is a great big circle, so you can start here and work your way all around.  If you get lost along the way, you’ll find the complete list of participating consultants on Melinda’s Blog: http://ifyoublingit.blogspot.com/p/stamp-of-month-blog-hop-list.html.


This month we have 80 Close To My Heart Consultants sharing their creations using this month's SOTM and other great CTMH products on their blogs. This is simple to do - just click on the link at the end of the post on each blog to move to the next one! Here we go!


Since my husband and I are celebrating our 13th anniversary today I decided to make him a special card/mini album! The card is a double Z fold card that measures approximately 6" x 8" when closed. I started with Whisper Cardstock for the base and decorated it with our new Snowhaven paper (who says it can only be used for winter/holiday projects??!!). 


To create the front of the card I used the "Family" portion of the "Family is Forever" stamp, curving it on my block to match the shape of the White Daisy Circle. The doily paper was cut with the Artiste cartridge at 4 1/4." I stamped the heart directly on the circle and then again on the coordinating heart image from the Artiste Cartridge using 3D Foam tape for added dimension.


The second layer of the card/mini uses two 4" x 6" photos. I stamped the hearts in Cranberry Ink on Cranberry Cardstock as well as the Happy Anniversary sentiment from a retired stamp set. I'm planning on writing a private message here as well. The flourishes are from the Sparkles Flourishes set. 


For the 3rd layer I stamped both sentiments on opposite panels and added a few more of our favorite photos.


The center panel of the card/mini is also 4" x 6." I stamped the tree image in Whisper Ink and colored the hearts with Carmine Shin Han marker. I added liquid glass to the top of the hearts for a little extra shine. I wrapped a few pieces of Metallic Bakers Twine around the panel and adhered to the card/mini with 3D Foam Tape.


I love the finished project and can't wait to give it to him! Hope he likes it :) 

Products Used (all CTMH unless otherwise noted):
Paper: Snowhaven (X7188B), White Daisy Cardstock, Glacier Cardstock, Cranberry Cardstock
Stamps: Family Love (S1409), Card Word Puzzle (retired)
Ink: Black (Z2105), Whisper (Z2172), Cranberry (Z2116)
Other: Liquid Glass (Z679), Small Black Flourishes (Z1916), Cricut Artiste Cartridge (Z1790), Shin Han Marker (Z2448), 3D Foam Tape (Z1151), Metallic Baker's Twine (Z1921), Keyboard Kraft Alphabet Stickers (retired), Border Punch (Martha Stewart)

Here's one more look of the card/mini fully opened:


Now "Hop" on over to Stefani's Blog to see her work! Be sure to visit all the Consultants at their Blogs to get some great crafting ideas and other fun ideas! Remember, the September SOTM is only available until 9/30!  Contact your CTMH Consultant (or click here) to see how you can get this stamp set at a discount!

Have a fantastic day!

~Michelle Battitori

Friday, August 15, 2014

Althernative Options for Picture My Life Cards


I few months ago I began a little series on Picture My Life. Yes, I had every intention of making it a weekly thing but somehow I've dropped the ball. I admit it... I tried. I failed.

I still adore the program and use it for my own family albums (to see my progress and some examples feel free to check out the "Picture My Life" labels on the left side of my blog).

One of the questions that always comes up is "What else can I do with the Picture My Life Cards?" The short answer is ALOT!

Check out the short CTMH video** below for some ideas and examples. Monica will also give you an overview of what comes in the program.


As a reminder, in August, when you buy one of the 13 Picture My Life programs, you will get an extra pack of Memory Protectors for just $3. That's a savings of $6.95. To read more about the Picture Perfection special go HERE.

<<<Start Shopping HERE>>>

~Michelle Battitori

**Note, if you are reading this blog post via email you may see the video. To view please click on the post title or click HERE to be taken to the CTMH YouTube channel.


Tuesday, August 12, 2014

What A Hoot Birthday Card


Who says the Stamp of the Month, What A Hoot, is for Halloween only? Not me, that's for sure! The little party hat that comes with the stamp set was my inspiration for today's card.

 I used this week's Mojo Monday Sketch #358 and our new Chalk It Up Paper to create this adorable birthday card! The bright colors of the paper work well for boy or girl which is always a plus in my book.


I paper pieced the owl by first stamping it on White Daisy Cardstock and then again on a piece of Chalk It Up pattern paper. A little bit of trimming and  Iwas left with an adorable little critter! Here's a little close-up for your viewing pleasure:


To create the wings I colored a couple of small pieces of White Daisy Cardstock with our new Shin Han Markers (#68 Turquoise). I let it dry for a sec and then flipped the paper over and stamped the wings with Black Ink. Flipping the paper over lets the color come through without saturating the image.

Alternatively, to color the party hat I started by stamping the image on White Daisy Cardstock with Black Ink. Then, I used the Turquoise Marker and the Marigold Marker to color on the front of the paper. It was also trimmed and added adhered to the card with 3D Foam tape. Hopefully you can see the difference in the two techniques.

Supplies Used (all CTMH unless otherwise noted):
Paper: Lagoon Cardstock, White Daisy Cardstock, Sorbet Cardstock, Chalk It Up Paper (X7184B)
Stamps: What A Hoot (S1408), Card Chatter - Birthday (D1475)
Ink: Black, Slate
Other: Shin Han Markers (#68 Turquoise Blue & #24 Marigold), Chalk It Up Assortment (Z3009), 3D Foam Tape, Scissors

Thanks for checking out my card today! If you are interested in any of the products used in this project please contact your CTMH Consultant or visit my web store HERE.

Have a great day!

~Michelle Battitori

Here's the inspiration sketch:


Monday, August 11, 2014

Pocket Page Protectors Special!

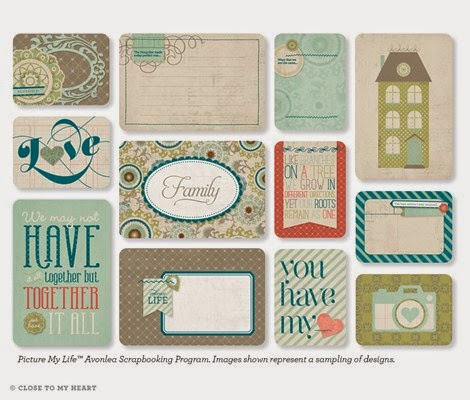
Pocket scrapbooking is a wonderful new way to capture your memories. Combine our innovative pocket memory protectors with lovely Picture My Life cards and your pictures to preserve the precious times of your life. No adhesives or embellishments needed!


During the month of August, when you purchase any of the 13 available Picture My Life™ scrapbooking programs featured in the Annual Inspirations idea book at their full retail price of $24.95, you are can add your choice of 1 of 8 Memory Protectors™ 10-packs for just $3! 


Each Picture My Life scrapbooking program already includes a coordinating 10-pack of Memory Protectors, so when you add your additional 10-pack for only $3, you will be well on your way to your own picture-perfect pocket scrapbooking adventure. 

Completed Picture My Life Layout


Each Picture My Life program includes:

  • 44 - 4" x 6" Cards (2 each of 22 designs)
  • 78 - 3" x 4" Cards (3 each of 26 designs)
  • 1 - 12" x 12" Designed Cover Sheet 
  • 10 - 12" x 12" Memory Protectors (various designs)
You'll be able to preserve double the memories in half the time! The hard part will be deciding which of the 13 programs to choose! There's a theme for every season of life—find yours!
New! Chalk It Up

New! For Always

New! Pear & Partridge

New! Seaside

New! Wanderful

Laughing Lola

Balloon Ride

Chantilly

Later Sk8tr

Skylark

Avonlea

Babycakes

Which one is your favorite? This special is only available until 8/31.

<<Shop HERE>>

~Michelle Battitori

Thursday, August 7, 2014

Build A Cake Birthday Card


I've been having a blast playing with the new products from the Annual Inspirations Idea Book and sharing my creations on the New Product Blog Hop.

There are so many fabulous consultants contributing to this hop and I hope you'll take a few moments to check it out! Simply click on any of the pictures below to visit other CTMH Consultants blogs and see their artwork. The hop will continue to grow until Aug 7 so feel free to come back to this post for more inspiration.


Speaking of the Idea Book, I've probably gone through it about 100 times already and every time I do I always stop on the Build A Cake stamp set!

This set has so many possibilities. I can totally see this being my go to set for anything birthday (or even wedding) related. I combined the set with the Confetti Wishes pack -- super bright and happy paper for any celebration! Two of the coordinating colors, Thistle and Canary, are new to this Idea Book and oh so pretty!

I based the card on Freshly Made Sketch #148. The card is 4 1/4" x 4 1/4" so that it would fit in a regular A2 envelope. I did add a few Bitty Sparkles and a touch of Glitz Glitter Glue for a hint of bling.

Products Used (all CTMH unless otherwise noted):
Paper: Canary Cardstock (X5772), Thistle Cardstock (X5769), Confetti Wishes Paper Pack (X7189B)
Stamp: Build A Cake (D1618)
Ink: Black (Z2105), Canary (Z2643), Thistle (Z2640), Pacifica (Z2192)
Other: Glitz Glitter Glue (retired), Bitty Sparkles (Z1263), Corner Rounder (Z1912), Border Punch (Martha Stewart), Ribbon (from my stash), Glue Dot

Thanks for checking out my card today! Here's the inspiration sketch:


~Michelle Battitori


Wednesday, August 6, 2014

Annual Inspirations New Product Blog Hop


Welcome to our Annual Inspiration New Product Blog Hop!  Each participant will be using products of their choosing to showcase the versatility and variety of the fabulous new products from Close To My Heart.

 If you have come here from Melissa Robinson's Blog, you are on the right path! The blog hop is a great big circle, so you can start here and work your way all around.  If you get lost along the way, you’ll find the complete list of participating consultants at Adeline's blog.

This month we have approximately 54 Close To My Heart Consultants sharing their creations. Working the hop is simple to do - just click on the link at the end of the post on each blog to move to the next one! Here we go!


For my project I'm featuring the new Seaside Paper Pack and the Hello Summer stamp set in a fun little mini-album! This is actually a project I made several months ago at a CTMH Regional event but I had to wait until August to share it. 


I'm still waiting for my summer vacation pictures to be developed so I've chosen to leave the pages blank for the time being. But, to give you an idea of what the mini-album looks like take a look at the interior pages below:

Cover & Page 1
Pages 2 & 3
Pages 3 & 4
Pages 5 & 6
Pages 7 & 8
Pages 9 & 10
Pages 11 & 12
Pages 12 & 13
Page 14 & Back Cover
Supplies Used:
Z1956  My Creations Hip Pics Album
C1595  My Acrylix Hello Summer
X7192B Seaside B&T Duos™
X5763 Smoothie Cardstock
X5762 Lagoon Cardstock
1385 White Daisy Cardstock
Z1934 Flamingo Dots
Z1887 My Crush Best Day Ever Assortment
Z1920 Gold Polka Dot Washi Tape

This really was a fun and easy project to make and I look forward to offering it as workshop soon so stay tuned for more info! 

Now "Hop" on over to Terry Ann Diack's blog to see her work! Be sure to visit all the Consultants at their Blogs to get some great crafting ideas and other fun ideas! 

Remember, the Annual Inspirations book is available all year!  Contact your CTMH Consultant (or click HERE) to get a copy of your Annual Inspirations Book today!

Thanks for checking out my project and have a wonderful day!

~Michelle Battitori

Friday, August 1, 2014

Annual Inspirations Blog Hop


If you are looking for inspiration to use the wonderful, brand new CTMH products then you've come to the right place! Join me and other CTMH consultants as we share our creations with new product from the Close to My Heart Annual Inspirations Idea Book!


This "hop" is a little different than others I've done. Simply click on any of the pictures below to visit other CTMH consultant's blogs and see their artwork. This hop will continue to grow with new entries until August 7, so come back to this post for more inspiration!

New entries are added at the bottom so scroll down to view the latest each day!
 

For my project I chose to focus on the Base 'N Bling Wearable Crafts line, specifically the Oval Cuff Bracelet

This project came together in minutes and I love how easy it was to customize my piece based on my own likes and favorite colors. Below is a step-by-step of how to create your own bracelet!

Supplies Needed (each product is linked to my web store for easy reference):
Step-By-Step:
 
1. Start by choosing an image from one of the two rectangular style sheets (Signature or Journey). I was drawn to the "I choose to be awesome today" sentiment from the Journey Style Sheet.
 
2. Once selected place the glass cover over top and lightly trace with a pencil. Remove glass cover and trim with your scissors. The cut does not need to be perfect but it should fit into the cuff easily. 
 3. Peel the backing off the sticker and place into your cuff. Generously apply Liquid Glass to the cuff. This is not a time to skimp! You want that cover to stay put!
 
 4. Place the glass cover on the Liquid Glass and hold for about 60-90 seconds. You want the Liquid Glass to ooze out the sides. This is to ensure you get all those pesky air bubbles out!
 
 5. Use baby wipes or wet paper towels to wipe up the excess liquid glass. It won't be completely dry but you can wear your new customized bracelet right away!
 
That's it! I told you it was easy. If you would like to make your own  bracelet please contact your CTMH consultant or visit my webiste, www.michellebattitori.ctmh.com.

Now, please enjoy the fabulous creations by other CTMH consultants by clicking on the links below!

Don't forget to come back to this post for new projects!

~Michelle Battitori

P.S. Thank you Tresa Black for setting this blog hop up! You rock!!